
If you’ve switched from a Windows computer to an iMac or Macbook running Apple’s macOS operating system, you may have trouble finding alternatives to many useful Windows apps and features, such as the Windows Snipping Tool for Mac.
If you’re looking for an alternative to the handy Windows Snipping Tool for taking screenshots of your screen or parts of your screen as an image, you’ll be pleased to know that you will still be using capture screenshots easily on your Apple device as there is an alternative to the Windows Snipping Tool for macOS that’s just as easy to use using keyboard shortcuts on Mac.
What shortcut to use to open the Snipping tool on Mac
The main control panel of the Mac snipping tool is accessed using the: Shift, Command, 5 keyboard shortcut, but you can also use: Shift, Command, and 3 to take a quick snapshot of the entire Mac screen or the: Shift, Command, and 4 keyboard shortcut to capture only a selected portion of the Mac screen.

Use the Mac shortcut key: Shift, Command, 5 on a MacBook or iMac running macOS Mojave or later to access the Mac Snipping control panel (pictured below), which appears at the bottom of the screen. Here you can perform various screen capture options, such as taking screenshots, capturing a selection of screen areas, and also recording screen videos for tutorials and instructional videos. Apple has also provided a number of useful settings that allow you to further customize your workflow if needed.
Mac Snipping tool options

Click the cross in the circle on the left side to close the Mac’s Sniper tool and return to the desktop. The other three buttons let you take screenshots and capture the entire screen, the second button from the left lets you capture a selected window, and the button with the dashed rectangle lets you capture selected parts of the Mac screen. When you hover over any of the buttons, a hint appears to remind you what that button does.
The other two buttons with circles in the lower-right corner let you capture video of your Mac’s screen, with the first button recording the entire screen and the second button with the dashed rectangle recording selected parts of your Mac’s desktop.
How to change the default Snipping tool save location on Mac
The Mac Snipping Tool also offers additional options that let you choose where to save screenshots or captured video on your Mac when you use the Snipping Tool. The default location for captured screenshots is the Desktop, but you can also choose to send captured screenshots using the Mac Snipping Tool to the Documents folder or directly to the Clipboard, Mac Mail, Messages, or Preview on macOS, or to a location of your choice. Other actions include the ability to set a timer for 5 or 10 seconds, Show floating thumbnail, Remember last selection, or Show mouse pointer.
Where to Find Screenshots on a Mac
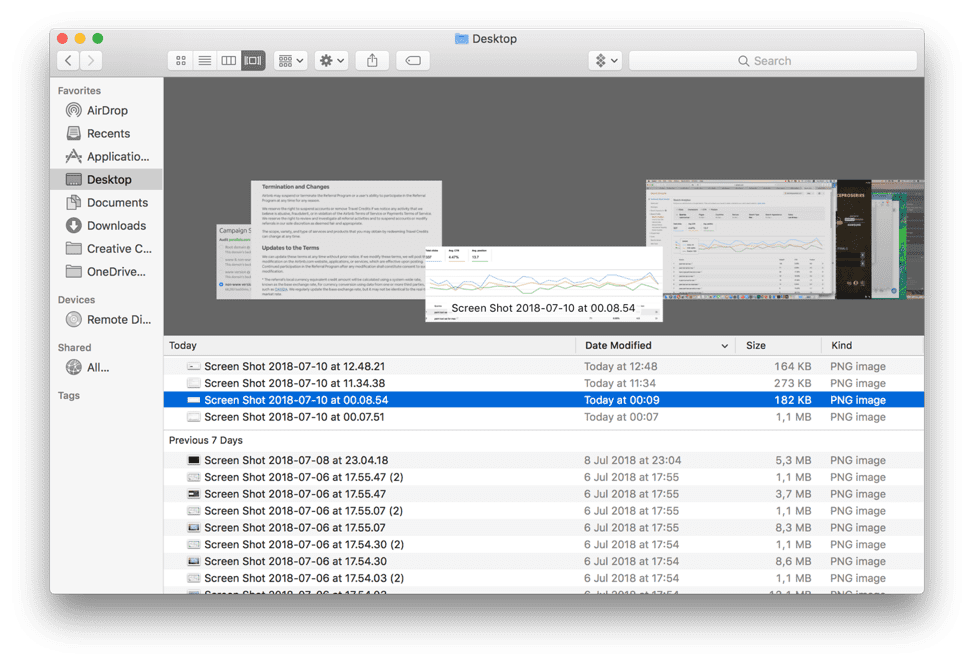
In the default settings, screenshots are saved as PNG images (with the current date and time stamp) directly to the desktop in the format looking like this: ‘Screen Shot 2018-07-04 at 12.25.36.png’.
Alternatively, the user can copy Mac screenshots to the clipboard by adding the Control key to the key combination and pasting it directly into the required documents.
Screen capture doesn’t work on my Mac? How to enable screen capture on Mac?
Shortcuts for screen capture may not work for several reasons although one of the most common is that they are simply disabled.
To fix this, do the following:
- Open System Preferences in the top-left corner of the Apple menu and click on Keyboard.
- In the new window, click Keyboard Shortcuts.
- In the left menu, find Screenshots.
- Make sure the keyboard shortcuts are active and have the same key combinations that you type.
- To change the shortcut, select it and click the new key combination.


